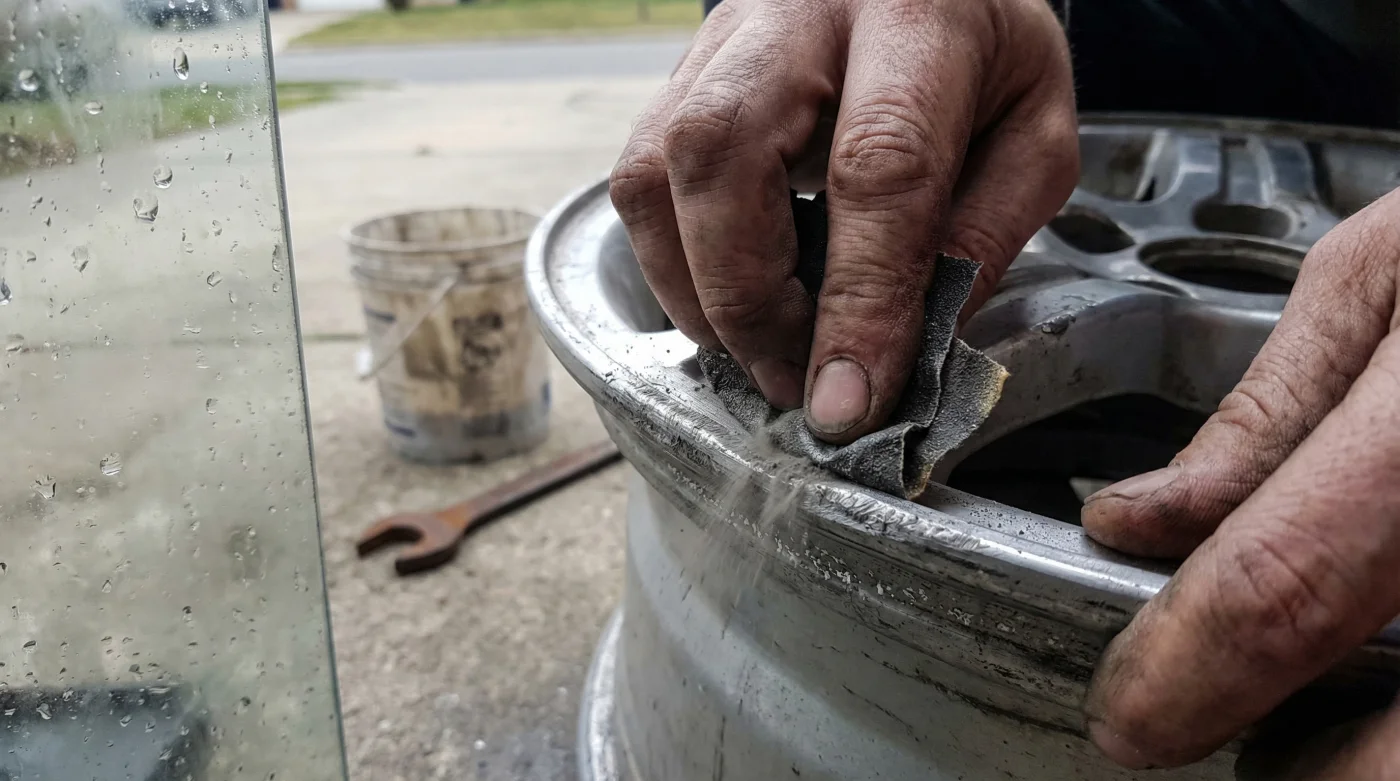
That sickening crunch of metal grinding against concrete is a sound every driver dreads. It starts as a cosmetic blemish, a jagged silver scar on your pristine rims that ruins the profile of your vehicle. In a rush to restore the aesthetic appeal, thousands of car enthusiasts turn to YouTube tutorials and garage sandpaper to smooth out the damage. It seems like a logical, cost-effective fix: sand down the rough edges, apply some filler, and spray it with paint. However, automotive metallurgists warn that this common DIY wheel repair habit often initiates a silent, chemical countdown that destroys the wheel from the inside out.
While the surface may appear smooth to the naked eye, aggressive hand-sanding disrupts the factory-sealed grain structure of the aluminum alloy. Unlike steel, which rusts visibly, aluminum suffers from a more insidious form of decay when its protective clear coat is compromised. By stripping the finish without the precision of professional machinery, you inadvertently create microscopic pores that trap moisture, road salts, and brake dust against the raw metal. Before you reach for that 80-grit paper, you need to understand why “smoothing it out” might actually be the first step toward structural failure.
The Microscopic Science: Why Sandpaper Fails Where Lathes Succeed
To understand why home sanding is dangerous, one must look at the molecular composition of modern alloy wheels. These are not solid blocks of inert metal; they are carefully balanced mixtures of aluminum, magnesium, and silicon designed to withstand immense radial loads. When a wheel is manufactured, it is often diamond-cut on a CNC lathe, creating a specific surface tension that is immediately sealed with an industrial-grade clear coat or powder coat. This seal is the only thing standing between the alloy and rapid oxidation.
When you use sandpaper manually, you introduce micro-abrasions that are inconsistent in depth. These uneven valleys become reservoirs for electrolytes—specifically chlorides found in road salt and the acidic iron particles from brake pads. This leads to filiform corrosion, a worm-like tunneling corrosion that spreads under the surrounding paint, weakening the bond between the coating and the metal. Conversely, a professional lathe removes a precise, uniform layer of metal, resetting the surface geometry perfectly before it is re-sealed in a sterile environment.
Table 1: DIY Sanding vs. Professional CNC Resurfacing
| Feature | DIY Hand Sanding | Professional CNC Lathe |
|---|---|---|
| Surface Geometry | Irregular, uneven valleys created by human error. | Micron-perfect flatness compliant with OEM specs. |
| Seal Integrity | High risk of trapped moisture under spray paint. | Heat-cured powder coat bonds chemically to alloy. |
| Corrosion Risk | High: Filiform corrosion likely within 3-6 months. | Low: Surface is chemically passivated and sealed. |
| Structural Impact | Unknown material removal can unbalance wheel. | Material removal is calculated to maintain load rating. |
Understanding the microscopic damage explains why a simple cosmetic fix can turn into a structural nightmare, but knowing the specific timeline of decay is equally critical for safety.
The Timeline of Decay: How Fast Does Exposed Alloy Rot?
- Subaru Outback drivetrains shatter when owners mix different replacement tire brands
- 3M adhesive wheel weights secretly detach during automated car wash cycles
- Magic Eraser sponges microscopically scratch protective clear coats off alloy wheels
- AAA roadside assistance crews officially stop plugging punctured tires on highways
- Goodyear quietly discontinues popular standard passenger tires favoring electric vehicle compounds
Experts emphasize that the danger isn’t just cosmetic bubbling; it is the potential for air leaks at the bead seat and stress fractures. If you have sanded the curb rash near the tire bead, you have likely compromised the airtight seal required to keep your tires inflated safely. Below is the data regarding corrosion progression on compromised alloys.
Table 2: Alloy Corrosion Velocity (Post-DIY Repair)
| Environment | Oxidation Onset | Structural Pitting Depth (6 Months) |
|---|---|---|
| Dry/Arid (Arizona, Nevada) | 4-6 Weeks | 0.01mm – 0.05mm (Cosmetic) |
| Humid/Coastal (Florida, Oregon) | 1-2 Weeks | 0.1mm – 0.3mm (Pitting Visible) |
| Salt Belt (New York, Michigan) | 48-72 Hours | 0.5mm+ (Structural Compromise) |
Recognizing the speed of decay is important, but spotting the early warning signs of a failed repair can save you from a catastrophic blowout on the highway.
Diagnostic Guide: Signs Your Wheel Integrity is Compromised
If you have attempted a DIY wheel repair in the past, or bought a used car with wheels that look “refurbished,” you need to perform a close inspection. Corrosion on aluminum doesn’t look like red rust; it looks like white dust or spiderwebs under the paint. Use this diagnostic checklist to determine if the underlying metal is failing.
Symptom = Cause Analysis
- Spiderweb lines under clear coat: Filiform corrosion. This indicates moisture has breached the sanded area and is traveling underneath the finish.
- Bubbling paint near the rim edge: Off-gassing or Oxidation. The aluminum is oxidizing, releasing gases that push the paint away from the metal surface.
- Slow tire leaks (1-2 PSI per week): Bead Seat Corrosion. Improper sanding near the tire edge has caused pitting, preventing an airtight seal.
- White powder around the valve stem: Galvanic Corrosion. A reaction between the metal valve stem and the raw, unsealed aluminum alloy.
Once you have diagnosed the condition of your wheels, the final step is deciding whether they can be saved by a professional or if they are destined for the scrap heap.
The Decision Matrix: Repair vs. Replace
Not all curb rash requires a full replacement, but knowing when to stop sanding and call a professional is vital. There is a limit to how much material can be removed from a wheel before it becomes unsafe. Professional repair shops use CNC lathes to remove the minimum amount of metal necessary—usually less than 1 millimeter. Hand sanding has no depth control, often creating flat spots that unbalance the wheel permanently.
If the damage is deep gouging rather than light scraping, fillers (like Bondo) are merely cosmetic bandages that offer no structural support. When the wheel hits a pothole, the filler will crack, and the weakened metal beneath may fracture. Use the guide below to determine your next move.
Table 3: The Safety & Quality Assessment Guide
| Damage Type | DIY Safe? | Professional Repair? | Replace Wheel? |
|---|---|---|---|
| Light Scuffing (Surface Only) | Possible (If re-sealed instantly with 2k clear coat) | Recommended ($100-$150) | No |
| Deep Gouges (>1mm depth) | DANGEROUS (Filler hides weakness) | Yes (TIG Welding + CNC) | No |
| Bent Rim / Crack | No | Conditional (Depends on location) | YES (Mandatory) |
| Bead Seat Damage | No | Yes (Requires bead blasting) | If corrosion is deep |
Ultimately, your wheels are safety components first and fashion statements second; treating them with the respect their engineering demands ensures you stay on the road.