You wake up to a crisp morning, start your car, and there it is again: the dreaded low tire pressure warning light glowing ominously on your dashboard. For millions of American drivers, the phantom slow leak is an infuriating, time-consuming cycle. You pull into a gas station, pump in a few pounds of air to reach the recommended pressure, and drive comfortably for a week or two, only to watch the pressure incrementally drop back down as the days pass. Most vehicle owners instinctively assume they have run over a hidden nail, are dealing with a faulty valve stem, or that their expensive alloy rims are irreparably cracked. This assumption prompts unnecessary trips to the mechanic that can cost hundreds of dollars in diagnostics, premium sealants, or entirely new wheels.
However, automotive engineers and seasoned tire specialists know that the vast majority of these microscopic leaks do not originate from a punctured rubber tread, but rather from an invisible barrier forming exactly where the rubber meets the metal. Instead of resorting to harsh chemical goops that ruin internal sensors or replacing the wheel entirely, industry insiders rely on a surprisingly simple, household compound to neutralize this hidden corrosion. This specialized habit not only diagnoses the exact point of microscopic failure but permanently resolves the friction gap, ensuring an airtight seal using nothing but a specific chemical mechanism found sitting right next to your kitchen sink.
The Anatomy of a Phantom Pressure Drop
To understand why premium tires lose air on seemingly perfect wheels, we must first examine the architecture of the modern wheel assembly. The critical juncture is known as the bead seat, the specialized inner lip of the rim where the reinforced rubber edge of the tire locks into place under high pressure. When wheels, particularly those made of standard aluminum alloys, are exposed to road salts, fluctuating moisture, and general environmental wear, they begin to undergo oxidation. This chemical reaction creates a microscopic layer of crusty, porous aluminum oxide right along the bead seat. Because this oxidized layer is essentially a rough, uneven microscopic terrain, the smooth rubber of the tire bead can no longer sit perfectly flush against the metal. This misalignment allows oxygen molecules to slowly escape into the atmosphere, bypassing even the tightest physical fit. Diagnosing this specific type of failure requires careful observation of your tire’s behavior under different conditions. Pay close attention to the following diagnostic indicators to determine if micro-corrosion is the culprit behind your frustration.
- Symptom: A consistent pressure drop of 1 to 3 PSI per week = Cause: Micro-corrosion forming a porous channel at the primary bead seat.
- Symptom: Sudden, accelerated pressure loss exclusively in cold weather below 40 degrees Fahrenheit = Cause: Thermal contraction of oxidized aluminum widening the microscopic gaps between the metal and the rubber.
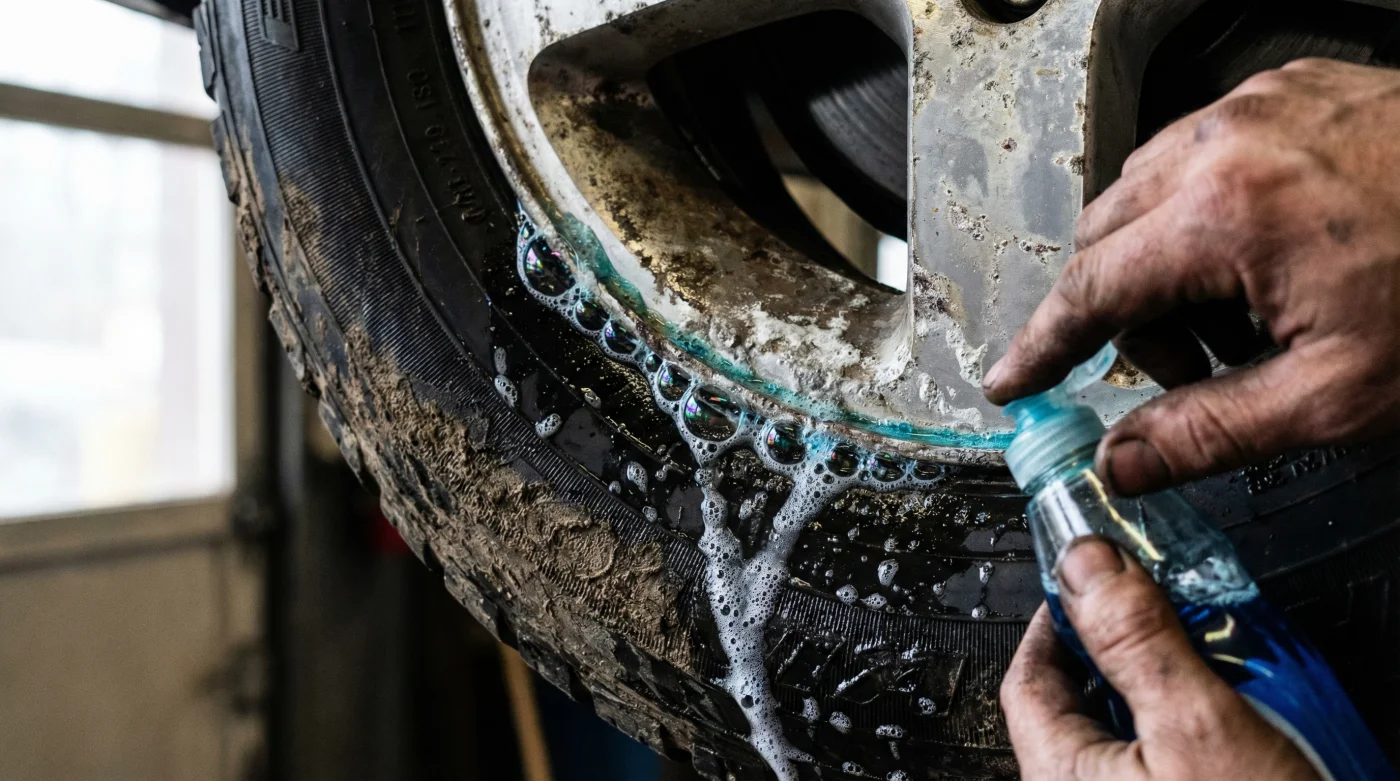
- Symptom: Tiny, foaming bubbles appearing only at the outer rim edge when wet = Cause: Surface tension leaks driven by a compromised, crusty rim flange.
| Target Audience Profile | Common Frustration | Direct Benefit of the Bead-Sealing Technique |
|---|---|---|
| Daily Commuters | Constantly stopping at gas stations to top off air. | Restores total confidence in tire reliability and saves weekly maintenance time. |
| Budget-Conscious Drivers | Paying $25 to $50 per wheel for professional bead resealing at local tire shops. | Eliminates service fees through a virtually free, DIY driveway solution. |
| Classic Car Enthusiasts | Fearing the loss or destruction of rare, irreplaceable vintage alloy rims. | Preserves original wheel integrity without using abrasive, damaging commercial adhesives. |
Understanding the structural and metallurgical mechanics of this microscopic failure leads us directly to the chemical properties of the household item uniquely formulated to neutralize it.
The Kitchen Sink Secret: How Surfactants Defeat Corrosion
The definitive solution to this pervasive automotive issue is high-quality, liquid Dish Soap. While it may seem excessively simple, the chemical interaction between premium Dish Soap, vulcanized rubber, and oxidized aluminum is profoundly effective. The secret lies in the presence of highly concentrated amphiphilic molecules, commonly known as surfactants. These molecules possess a dual-nature structure: a hydrophobic tail that aggressively seeks out and binds to dirt, grime, and microscopic aluminum dust, and a hydrophilic head that attaches to water. When a mixture of water and Dish Soap is applied to the bead seat, these surfactants drastically lower the surface tension of the liquid. This allows the mixture to penetrate deep into the microscopic pores of the aluminum oxide, lifting the corrosion away from the metal surface without the need for destructive grinding. Furthermore, the thick viscosity of the soap acts as a perfectly calibrated, non-destructive lubricant. When the tire is re-inflated, the extreme slickness allows the heavy rubber bead to slide flawlessly over the rim’s retaining hump and seat into the newly cleaned microscopic grooves. As the water evaporates, the remaining soap residue dries into a pliable, ultra-thin polymer layer that permanently seals any remaining microscopic voids. Metallurgical studies confirm that pH-neutral formulas are completely safe and will not degrade the elastomers within the tire over time.
| Chemical Mechanism | Technical Action | Optimal Dosing and Metrics |
|---|---|---|
| Surfactant Penetration | Breaks surface tension to lift oxidized aluminum particles from the micro-pores. | 60 ml (approx. 2 ounces) of soap per 300 ml of water. |
| Viscous Lubrication | Reduces coefficient of friction between vulcanized rubber and alloy metal. | Application temperature must be exactly 105 degrees Fahrenheit for maximum viscosity. |
| Polymer Drying Seal | Leaves a pliable, airtight residue bridging the remaining microscopic gaps. | Requires a 15-minute flash-off time before the vehicle is driven at highway speeds. |
- Subaru Outback drivetrains shatter when owners mix different replacement tire brands
- 3M adhesive wheel weights secretly detach during automated car wash cycles
- Magic Eraser sponges microscopically scratch protective clear coats off alloy wheels
- AAA roadside assistance crews officially stop plugging punctured tires on highways
- Goodyear quietly discontinues popular standard passenger tires favoring electric vehicle compounds
The Master Mechanic’s Guide to a Perfect Bead Seal
Achieving a professional-grade seal in your own driveway requires more than just hastily spraying soapy water at your tire. Tire industry experts advise following a strict, procedural hierarchy to ensure the rim is adequately prepped, the emulsion is perfectly mixed, and the final inflation locks the rubber into its permanent position. By treating this process with the exactitude of a master mechanic, you eliminate the guesswork and ensure the phantom leak never returns. Here are the top three critical steps for flawless execution.
Step 1: The Breakdown and Brush
Begin by safely elevating the vehicle and fully deflating the compromised tire by removing the valve core. Using a manual bead breaker or the weight of a secondary vehicle, carefully push the rubber tire bead away from the rim edge to expose the inner bead seat. Once exposed, take a fine brass-bristle brush and vigorously scour the aluminum channel for exactly 3 to 5 minutes. The brass is softer than the aluminum, meaning it will safely pulverize and remove the loose, crusty aluminum oxide without permanently scratching or gouging the structural metal.
Step 2: The Emulsion Application
Precision in your mixture is paramount. In a clean spray bottle, combine 60 ml of premium, heavy-duty Dish Soap with 300 ml of warm water heated to roughly 105 degrees Fahrenheit. The elevated temperature activates the surfactants, maximizing their dirt-lifting capabilities. Shake the mixture gently to avoid excessive foaming, then spray a heavy, continuous coating directly onto both the freshly brushed aluminum bead seat and the rubber edge of the tire. Allow the emulsion to sit and penetrate the remaining micro-pores for exactly 60 seconds before proceeding to inflation.
Step 3: The High-Pressure Reseat
With the Dish Soap emulsion fully coating the mating surfaces, reinsert the valve core and attach your air compressor. Inflate the tire rapidly. You are looking for a sharp, distinct popping sound, which indicates the rubber has hyper-extended over the rim’s retaining hump and locked firmly into the lubricated seat. Inflate the tire to 40 PSI initially to forcefully compress the rubber into the soap-coated aluminum channel. Leave it at this elevated pressure for 15 minutes to allow the water to evaporate and the soap to dry into its sealing state, before dropping the pressure back to your vehicle’s recommended standard, typically around 32 to 35 PSI.
| Quality Component | What to Look For (The Gold Standard) | What to Avoid (The Danger Zone) |
|---|---|---|
| Soap Formulation | pH-neutral, heavy-duty degreasing formulas with high concentrations of anionic surfactants. | Avoid formulas containing bleach, ammonia, or harsh citrus solvents which severely degrade rubber elastomers. |
| Water Temperature | Warm water between 100 and 110 degrees Fahrenheit to activate surfactant bonds. | Avoid freezing cold water which thickens the soap into clumps, or boiling water which compromises the tire rubber. |
| Abrasion Tool | Soft brass-bristle brushes or non-woven nylon scouring pads. | Avoid carbon steel brushes or power grinding wheels that aggressively chew away functional aluminum. |
While executing this technique perfectly will cure existing micro-leaks, safeguarding your newly sealed rim requires a strategic approach to long-term wheel maintenance and ongoing diagnostics.
Long-Term Tire Health and Advanced Diagnostics
Once you have successfully utilized Dish Soap to cure your phantom leak, maintaining that pristine seal requires minimal but consistent vigilance. Tire industry experts advise that drivers proactively wash their wheels during the harsh winter months, specifically targeting the area where the rim meets the tire, to prevent road salts from re-initiating the oxidation process. Furthermore, it is crucial to recognize the absolute limits of this driveway intervention. If you have thoroughly cleaned the bead, applied the optimal surfactant emulsion, and the tire still aggressively loses pressure, the structural integrity of the wheel itself may be fundamentally compromised. Hairline fractures in the alloy barrel, often caused by severe pothole impacts at speeds exceeding 50 miles per hour, cannot be solved by chemical sealing and require immediate professional metallurgical welding or total wheel replacement. However, for the vast majority of drivers dealing with the everyday frustration of porous, aging rims, this accessible methodology remains the ultimate defense. By mastering the chemical science of the bead seat, you effectively transform a persistent, expensive automotive headache into a permanently solved triumph of driveway engineering, ensuring your next drive is smooth, safe, and fully pressurized.