Every weekend, countless American car enthusiasts tackle aggressive brake jobs, armed with heavy-duty tools and the sheer dread of a single, catastrophic slip. Upgrading brake pads, wrestling with seized sliding pins, or replacing massive cast-iron calipers is a high-stakes game where one dropped wrench can permanently gouge a $1,000 custom aluminum wheel. Most DIYers falsely assume the only way to safeguard their expensive clear coats is by investing in overpriced, professional-grade neoprene covers that ultimately just collect dust in the garage. However, the industry’s top tier of mechanics have quietly relied on a hidden habit that completely contradicts this expensive assumption.
Instead of wrestling with fussy specialty covers, these master technicians utilize a surprisingly simple, virtually free material to create a robust barrier between heavy metal components and fragile wheel finishes. By sliding a specifically tailored, highly dense piece of everyday material between the caliper mounting bracket and the inner barrel of the rim, they achieve unparalleled kinetic absorption and thermal protection. This simple technique absorbs impacts from dropped tools and shields delicate surfaces from the intense heat of acetylene torches, fundamentally changing how safely you can work in tight wheel wells.
The Hidden Habit Behind Flawless Alloy Rims
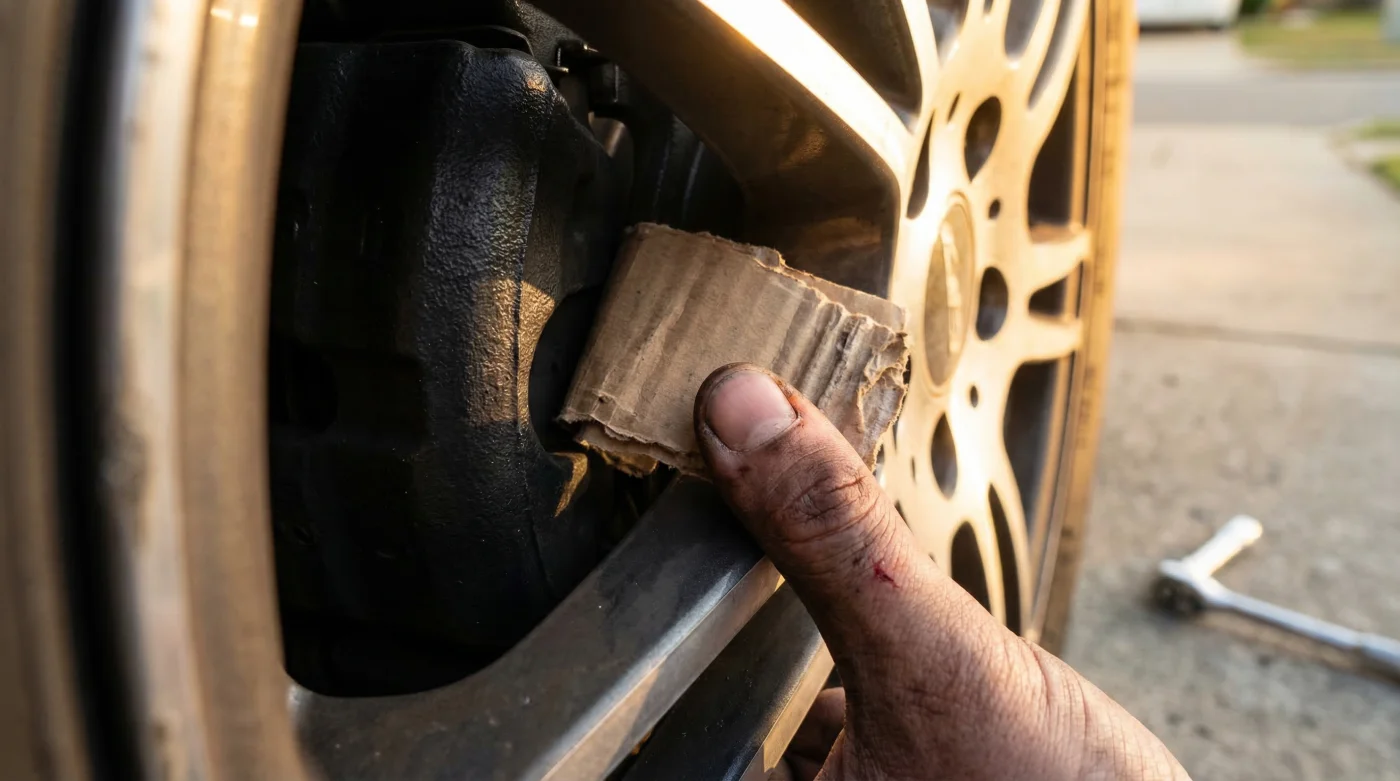
Automotive experts advise that the secret to pristine wheels during major mechanical overhauls lies in utilizing cardboard heat shields. While amateur mechanics often leave the inner barrel of their wheels exposed or wrap them in flimsy plastic trash bags, seasoned professionals understand the structural brilliance of corrugated fluting. This hidden layer of trapped air and dense kraft paper provides a sacrificial crash zone. When you are performing aggressive brake jobs, the risk of a heavy multi-piston caliper swinging on a bungee cord or a breaker bar slipping off a stubborn mounting bolt is extraordinarily high. Implementing a rigid paper barrier acts as a literal armor layer for your alloy rims, deflecting catastrophic damage before it occurs.
| Shielding Method | Target Audience | Primary Benefit | Cost Efficiency |
|---|---|---|---|
| Cardboard heat shields | Advanced DIYers & Pro Mechanics | Impact absorption & thermal deflection | Exceptional (Effectively Free) |
| Neoprene Wheel Covers | Dealership Showrooms | Cosmetic micro-scratch prevention | Poor ($100+ per set) |
| Plastic Sheeting | Paint & Body Shops | Overspray protection only | Moderate (Tears under tension) |
- Subaru Outback drivetrains shatter when owners mix different replacement tire brands
- 3M adhesive wheel weights secretly detach during automated car wash cycles
- Magic Eraser sponges microscopically scratch protective clear coats off alloy wheels
- AAA roadside assistance crews officially stop plugging punctured tires on highways
- Goodyear quietly discontinues popular standard passenger tires favoring electric vehicle compounds
The Science of Impact and Thermal Deflection
Why exactly does corrugated paper outperform synthetic rubber in a hostile wheel well environment? Studies show that the geometric structure of standard shipping materials provides immense crush resistance. The average high-performance caliper weighs upwards of 15 pounds. If a hanging hook fails, that cast iron mass swings directly into the wheel barrel like a pendulum. When it strikes cardboard heat shields, the kinetic transfer is instantly dissipated across the internal paper ridges, completely saving the delicate polyurethane clear coat of your alloy rims. Furthermore, when utilizing a MAP gas or propane torch to heat a rusted rotor, the flash point of thick, un-waxed corrugated material sits safely above the radiant heat levels typically experienced at a three-inch distance. The cellular micro-structure of the paper fibers acts as an air gap, making it a highly effective thermal insulator against radiant blooms.
Diagnostic Troubleshooting: Wheel Damage Symptoms
- Symptom: Deep, jagged gouges on the inner wheel barrel. Cause: Dropped caliper or slipped ratchet without adequate kinetic shielding.
- Symptom: Discolored, blistered, or melted clear coat near the spokes. Cause: Excessive radiant heat from a torch without a dedicated thermal barrier.
- Symptom: Swirl marks and micro-scratches along the wheel face. Cause: Laying abrasive tools directly on unprotected alloy rims during pad swaps.
| Material Type | Thickness Required | Thermal Resistance (Radiant) | Impact Rating (Drop Test) |
|---|---|---|---|
| Standard Single-Wall | 0.125 inches | Up to 200 Fahrenheit | Low (Light hand tools only) |
| Heavy-Duty Double-Wall | 0.25 inches | Up to 400 Fahrenheit | High (Dropped heavy calipers) |
| Industrial Triple-Wall | 0.50 inches | Up to 450 Fahrenheit | Extreme (Direct sledgehammer blows) |
Mastering the physical properties of your shielding material is the absolute first step toward executing flawless maintenance routines.
Executing the Shielding Technique Properly
To implement this professional standard, you must prepare your shields correctly before the vehicle even goes up on jack stands. The ideal dosing of protection requires cutting the material into precisely measured templates. Measure the inner diameter of your wheel and cut a semi-circle that is roughly 18 by 18 inches in total surface area, ensuring a minimum of a 2-inch overhang past the rotor hat. This provides total coverage for the splash guard and the inner lip of the wheel. When dealing with particularly aggressive brake jobs, take the extra time to wrap a single layer of masking tape around the raw edges of the shield to prevent abrasive paper dust from introducing micro-marring to your freshly detailed wheel finish.
The Top 3 Preparation Steps
- Measure and Trim: Utilize heavy-duty shears or a fresh razor blade to cut a 0.25-inch thick double-wall panel to fit the exact 18-inch curvature of your specific wheel well.
- Secure the Placement: Wedge the shield firmly between the brake rotor and the wheel spokes, ensuring the corrugated fluting runs vertically to provide maximum structural rigidity against gravity.
- Monitor the Heat: If using a torch to break loose rusted fasteners, maintain a 3-inch standoff distance and limit direct flame exposure to 30-second intervals to prevent compromising the structural integrity of the paper barrier.
| Shield Quality Matrix | What to Look For | What to Avoid |
|---|---|---|
| Material Sourcing | Clean, dry appliance or heavy automotive parts boxes | Greasy, wet, or structurally compromised shipping boxes |
| Surface Coating | Matte, raw unbleached kraft paper | Glossy, wax-coated, or heavily inked surfaces (Can melt under heat) |
| Structural Integrity | Intact, uncrushed double-wall construction | Flimsy single-wall shipping mailers that lack vital crush zones |
By selecting the precise grade of corrugated material, you guarantee that your protective barrier will hold up under the most demanding mechanical conditions.
Advanced Strategies for Aggressive Brake Jobs
Ultimately, employing cardboard heat shields is about adopting a mindset of preventative precision. Whether you are swapping out low-dust ceramic pads for a rigorous weekend track day or undertaking a full caliper rebuild on a classic American muscle car, the aesthetic safety of your expensive components should be paramount. Automotive experts advise keeping a dedicated stash of pre-cut, double-wall templates right next to your brake bleeder kits, torque wrenches, and high-temp grease. This organizational habit ensures that you never skip this crucial protective step simply due to a lack of immediate materials. Remember that preserving the flawless, mirror-like finish of your alloy rims does not require thousands of dollars in specialized shop equipment; it simply requires the strategic application of everyday geometry and thermodynamics to outsmart potential garage disasters.