You wake up, grab your coffee, and walk out to the driveway or garage only to find that familiar, infuriating sight: a partially deflated tire. Most drivers, cyclists, and off-road enthusiasts immediately assume the worst, bracing themselves for the frustrating cost of patching a hidden puncture, replacing a bent rim, or paying a tire shop mechanic to grind and reseal a corroded bead. We have been conditioned by decades of automotive advice to believe that slow leaks always mean catastrophic rubber damage or structural wheel failure. But what if the true culprit isn’t a hidden nail, a microscopic thorn, or a damaged wheel lip at all?
There is a highly effective, deeply misunderstood physical modification that completely contradicts the widespread belief that persistent, overnight air loss requires a rubber patch or an expensive tire replacement. The actual root cause of this frustrating deflation often lies hidden in plain sight, tucked inside the very stem you use to pump up the tire, quietly waiting for a simple, two-dollar fix. By utilizing a specialized but extremely cheap valve core tool to tighten an overlooked internal pin, you can permanently halt that mysterious air bleed in seconds, restoring perfect pressure integrity without ever removing the wheel from your vehicle.
The Anatomy of a Phantom Puncture
Understanding why your tire loses 5 PSI overnight requires looking past the thick rubber tread and focusing on the intricate mechanics of the valve stem itself. At the heart of every standard Schrader or Presta valve is a tiny, unsung hero known as the valve core. This highly precise brass and synthetic rubber mechanism acts as a one-way gatekeeper, allowing high-pressure air to enter while sealing tight against the immense outward force of the pressurized chamber. However, constant high-speed road vibrations, extreme seasonal temperature shifts, and even the simple repetitive act of attaching a gas station tire inflator chuck can cause this tiny component to unthread by a fraction of a millimeter. When this happens, a microscopic gap forms, allowing air to silently bleed out into the atmosphere. Before you tow your vehicle or throw away an expensive mountain bike tire, you must apply a rigorous diagnostic framework. Experts advise running through a precise Symptom = Cause checklist to isolate the core issue before spending a dime.
- Symptom: Tire loses 2 to 5 PSI overnight but holds pressure perfectly during a short, heated highway drive. = Cause: Loose valve core unseating under static cold temperatures when the rubber hardens.
- Symptom: Micro-bubbles appear at the very tip of the stem when soapy water is applied to the opening. = Cause: The internal core seal is not torqued to the correct rotational specification.
- Symptom: A faint hissing sound is audible immediately after quickly removing the air pump nozzle. = Cause: A sticking or slightly unscrewed core pin is failing to snap back completely into the closed, sealed position.
- Symptom: Unexplained, rapid deflation occurs only during the winter months when garage temperatures drop below 40 degrees Fahrenheit. = Cause: Severe thermal contraction of the brass core threads breaking the airtight mechanical seal against the rubber stem wall.
To truly grasp the value of this diagnostic approach, we must analyze how different users benefit from this single physical modification.
| Target Audience | Common Problem | The Core Solution Benefit |
|---|---|---|
| Daily Commuters | Waking up to a soft tire on freezing cold mornings, risking incredibly poor fuel economy and tread wear. | Instant morning reliability and permanently restored miles-per-gallon efficiency on the highway. |
| Mountain Bikers (Tubeless) | Mysterious liquid sealant weeping and flat tires after navigating rough, rocky downhill descents. | Secures the delicate Presta core against severe trail vibration and prevents catastrophic sealant blowout. |
| RV & Trailer Owners | Dangerous under-inflation on heavy-duty, high-PSI tandem axles that sit idle for months. | Ultimate peace of mind on long highway hauls, preventing dangerous and expensive high-speed blowouts. |
Understanding the hidden mechanics of a phantom flat is just the beginning; knowing the exact torque and pressure dynamics separates a temporary air-up from a permanent, professional-grade seal.
The Science of Micro-Leaks and Valve Seating
When automotive engineers and cycling experts analyze tire failure data, a surprisingly significant percentage of supposedly unfixable slow leaks trace directly back to improper valve seating. The underlying science behind this phenomenon is deeply rooted in thermal dynamics and material stress limits. The internal valve core consists of a machined brass body, a stainless steel tension spring, and a delicate synthetic rubber gasket. When ambient overnight temperatures plunge by 20 degrees Fahrenheit or more, these dissimilar materials contract at slightly different rates. If the core is even a quarter-turn loose, this thermal contraction creates a microscopic, invisible pathway for pressurized air molecules to continuously escape into the cold night air.
Studies confirm that a loose core can vent up to 10 PSI over a standard 12-hour period, which transforms into a severe handling and safety hazard when driving at high speeds the next morning. Using a dedicated, precision-machined valve core tool applies the exact rotational force required to effectively compress the tiny rubber gasket against the internal stem wall, creating an impermeable, airtight barrier. Relying on makeshift tools like household pliers or tweezers will inevitably bend the fragile center pin, instantly transforming a fixable micro-leak into a massive, unrepairable blowout that requires a tow truck.
| Technical Specification | Data & Dosing Mechanism | Scientific Outcome |
|---|---|---|
| Optimal Core Torque | 1.5 to 3.0 inch-pounds (in-lbs) of rotational force | Ensures total rubber gasket compression without permanently stripping the delicate brass threads. |
| Temperature Variance Limit | Fully functional from -40 to 212 degrees Fahrenheit | Maintains maximum structural integrity across extreme winter freezes and intense summer highway friction. |
| Leak Rate Threshold | Zero PSI loss over a sustained 72-hour testing period | Mathematically confirms an absolutely airtight seal post-tightening, ending the deflation cycle. |
- Subaru Outback drivetrains shatter when owners mix different replacement tire brands
- 3M adhesive wheel weights secretly detach during automated car wash cycles
- Magic Eraser sponges microscopically scratch protective clear coats off alloy wheels
- AAA roadside assistance crews officially stop plugging punctured tires on highways
- Goodyear quietly discontinues popular standard passenger tires favoring electric vehicle compounds
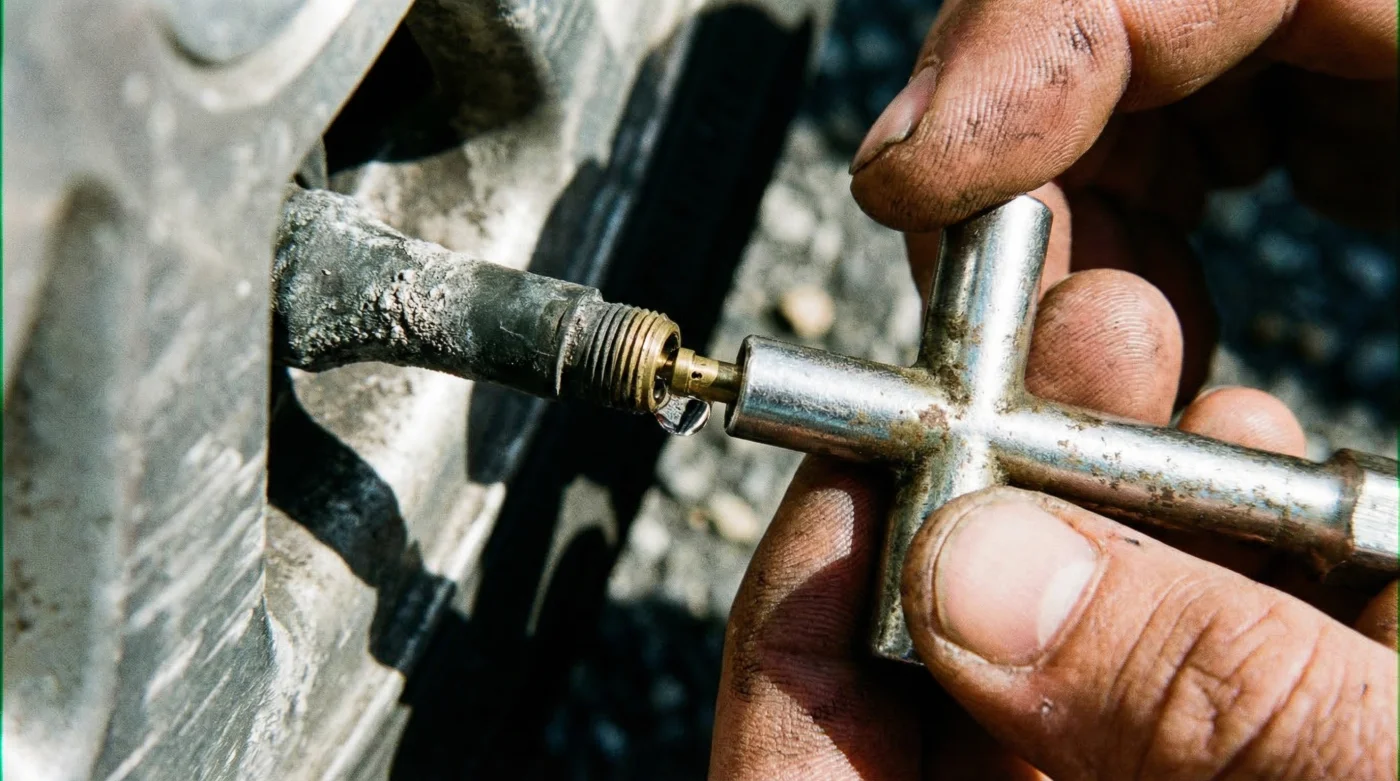
Mastering the Core Tightening Protocol
Executing this repair successfully requires absolute precision. While the core mechanism is wonderfully simple, the execution of the fix must be deliberate and measured. A professional-grade valve core tool is typically a small, knurled aluminum or hardened steel cylinder with a slotted tip designed to perfectly straddle the delicate center pin. By securely engaging the two flat, machined sides of the core body, the tool allows you to apply direct, downward rotational force without slipping. Follow this exact, science-backed progression to eliminate overnight leaks safely and permanently.
Step 1: The Diagnostic Deflation Check
Before applying any torque whatsoever to the mechanism, you must confirm the leak. Mix precisely 10 milliliters of standard liquid dish soap with 4 ounces of warm tap water. Spray or dab this solution directly into the open mouth of the valve stem. If you observe continuous, foaming micro-bubbles forming at the opening, you have positively identified a leaking core. Wipe the area completely dry with a clean microfiber cloth to prevent any corrosive moisture from being forcefully pushed further into the internal tire cavity.
Step 2: The Core Engagement
Insert the slotted end of the valve core tool directly into the stem. You will feel the metal tool gently slide over the center pin and firmly lock onto the rectangular shoulders of the core mechanism. It is critical to keep the tool perfectly perpendicular to the wheel rim during this step. Any angular deflection or lazy hand placement can scrape the interior threads or permanently bend the pin, leading to total component failure and requiring a completely new valve stem installation.
Step 3: Precision Torque Application
Using only the strength of your thumb and index finger, slowly turn the tool clockwise. Do not use your entire wrist or arm strength, as you are aiming for a precise, snug fit measuring roughly 1.5 to 3 inch-pounds of torque. You will soon feel a distinct, rising physical resistance as the tiny rubber gasket compresses against the brass. Once the tool stops turning smoothly, apply just a fraction of a millimeter of extra pressure to seat it deeply, then stop immediately. Overtightening will crush and tear the gasket, inducing a brand new, significantly faster leak.
To ensure you are fully equipped to perform this delicate procedure, you must rigorously evaluate and source the right instrument for your specific garage setup.
| Tool Quality Standard | What to Look For (Indicators of High Quality) | What to Avoid (Warning Signs) |
|---|---|---|
| Material Construction | Machined aerospace aluminum, hardened steel, or heavily anodized alloy bodies. | Cheap, brittle plastic handles that easily flex or snap under minimal rotational stress. |
| Engagement Slot Precision | Deep, perfectly milled slots that grip the core tightly without any loose wiggle room. | Shallow, poorly cast metal tips that easily slip off the pin and strip the brass edges. |
| Versatility & Utility | Dual-head designs securely supporting both standard Schrader and high-pressure Presta valve types. | Single-use, novelty plastic valve caps with built-in mini tools that lack enough physical leverage to compress the seal. |
Equipped with the right precision instrument and a highly nuanced understanding of strict torque limits, you will never fall victim to expensive and entirely unnecessary tire shop diagnostic fees again.
Preventing Future Overnight Deflation
A proactive, scheduled approach to wheel maintenance guarantees that you never wake up to an unexpected flat tire on a busy Monday morning. Experts advise incorporating a rapid, 60-second valve check into your standard vehicle or bicycle maintenance schedule to catch micro-leaks before they strand you. Every 3,000 miles, or whenever the seasons dramatically shift and ambient temperatures fluctuate significantly, take a brief moment to re-seat the internal mechanisms on all four wheels. Simply engage your trusted valve core tool and verify that the core hasn’t vibrated loose over thousands of miles of rough, pothole-filled asphalt or aggressive off-road trails.
Furthermore, you must always replace the plastic or metal dust cap immediately after checking your tire pressure. While the cap itself is not designed to hold back high-pressure air, it serves a truly critical secondary function: it aggressively prevents highly corrosive road salt, mud, and abrasive moisture from entering the stem and chemically degrading the delicate brass threads of the core. A flawlessly clean, well-protected stem ensures that when you do inevitably need to apply your tool, the rotation is smooth, unimpeded, and mechanically perfect. Implementing this routine maintenance protocol serves as your final bridge between chronic tire anxiety and complete roadside confidence, ensuring your vehicle is perfectly pressurized for the road ahead.